

Form field settings
Each form field has different setting options. Every field must be given at least a name. Click on the form field to open its settings. The settings usually include 2 tabs: Settings and Visibility. Some field types have additional tabs – for example, the input field also has Set values and Validators.

These 4 tabs are explained below:
Tab 1: Settings
General settings are configured here. Example: "Input field":
Name: Name of the form field. Important: if the name is changed, the corresponding placeholder name changes too. Make sure to check your email and export settings if you rename a field.
Default value: The value entered here will be pre-filled when the form is opened. With the option "Default as placeholder", this value is only shown with a grey background (e.g. as explanation text) – the field remains empty despite the displayed default.
Required: If selected, this field must be filled in before the form can be sent.
Tab 2: Visibility
Here the form field can be configured to only appear when a condition in another form field is met.
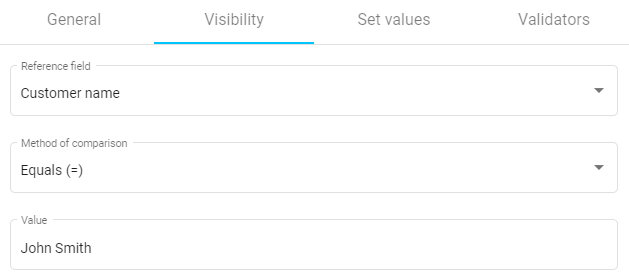
Reference field: Select the field that controls visibility, e.g. "Customer name".
Comparison method: Depending on the type of reference field (text, number, checkbox, etc.), different methods are available, e.g. "Is equal".
Value: The value that should make this field visible.
Tab 3: Set values
Set values allow fields to be filled in automatically based on input in a reference field. For example, customer addresses can be stored and filled in automatically once a customer name is entered – saving a lot of manual typing.
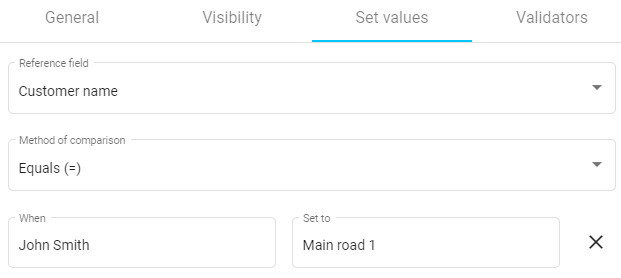
Reference field: Select the field that controls the auto-fill, e.g. "Customer name".
Comparison method: Depending on the type of reference field, different methods are available, e.g. "Is equal".
When – Set to: Rules are defined line by line. When the condition in the "When" field is met, the "Set to" value is filled in automatically.
Import from XLSX file: Large datasets (e.g. customer addresses) can be imported directly via an XLSX table, instead of entering rules line by line (see also Set values function).
Tab 4: Validators
Validators allow you to specify exactly which character strings are accepted as input.
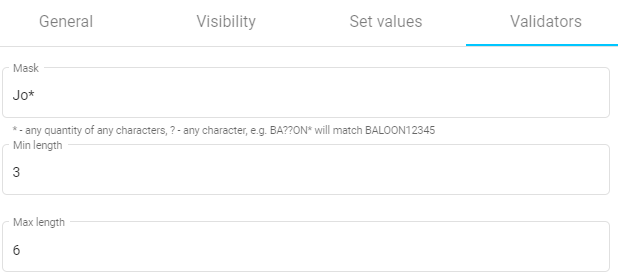
Mask: Define the allowed character pattern. Wildcards * (any string) and ? (any single character) can be combined with specific characters.
Min length: Minimum number of characters that must be entered.
Max length: Maximum number of characters allowed.
Specific setting options for all available field types can be found on the following pages.