
Form field settings
Each form field has different setting options. Each form field must be given at least a name. Click on the form field to open the settings. The settings usually include 2 tabs: Settings and Visibility. Some field types have additional tabs, like the input field with the 2 additional tabs Set values and Validators.

These 4 settings tabs are explained below:
1st tab: General
General settings are made here. Example “Input field”:
Name: Name of the form field. Important: If the name is changed, the corresponding placeholder name will also change. Therefore, be sure to check your email and export settings in this case.
Default: The value entered here will then be pre-filled when filling in later. With the option “Default as placeholder” this value is only displayed with a gray background (e.g. as explanation text), so the field actually remains empty despite the default value then displayed.
Required: If selected, this field must be filled in before the form can be sent.
2nd tab: Visibility
Here the form field can be configured so that it is only displayed if a condition in another form field is fulfilled.
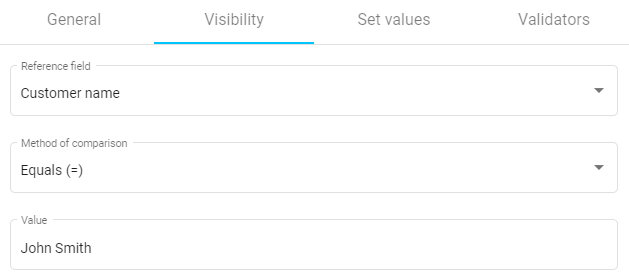
Reference field: Set the reference field here, e.g. Customer name.
Method of comparison: depending on the type of the reference field (text, number, checkbox, etc.) corresponding comparison methods are available . Select the desired method, e.g. “Is equal”.
Value: Enter the value that should make this field visible
3rd tab: Set values
By using set values, values can be filled in automatically depending on the input in the reference field. For example, you can store customer addresses in this way, which are then filled in automatically after the customer name is entered. This saves a lot of manual typing.
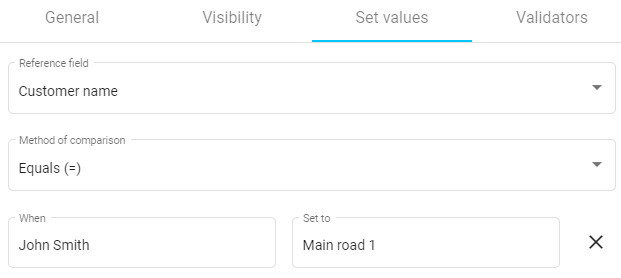
Reference field: Set the reference field here, e.g. Customer name.
Method of comparison: depending on the type of the reference field (text, number, checkbox, etc.) corresponding comparison methods are available . Select the desired method for your values block, e.g. “Is equal”.
When – Set to: Here the rules can be defined line by line. If the condition in the When field is fulfilled, then the Set to value is automatically filled in accordingly.
Import from XLSX file: Instead of entering conditions line by line, large data sets, e.g. with customer addresses, can be imported directly here using an XLSX table (see also set value function).
4th tab: Validators
Validators can be used to specify which exact strings are allowed as input.
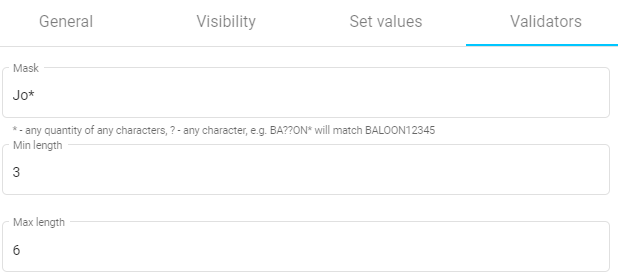
Mask: set the allowed string. Wildcard characters * (any string) and ? (any character) can be used in combination with concrete characters.
Min length: minimum number of characters that must be entered.
Max length: maximum allowed number of characters to be entered.
Specific setting options for all available fields can be found on the next pages.